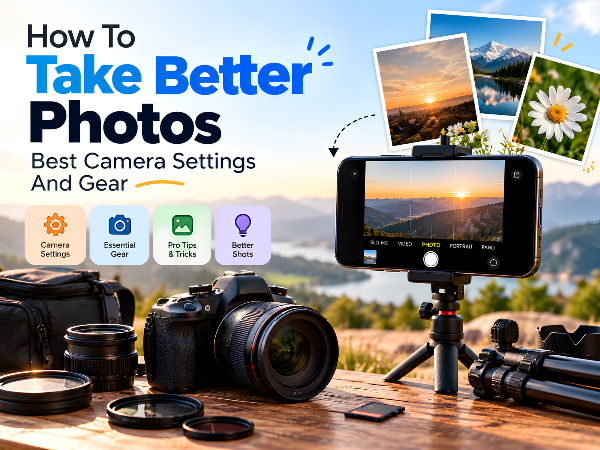
You don't always need an expensive camera or a flagship smartphone to capture stunning photos. Sometimes, a few simple changes to your camera settings, better lighting and the right accessories can make a noticeable difference.
Whether you're taking portraits, capturing travel memories, clicking food pictures or creating content for social media, understanding how to take better photos with your smartphone can help you get sharper, brighter and more professional-looking results.
In this guide, we'll cover the best smartphone camera settings, practical photography techniques and useful accessories that can help you improve your photography without spending unnecessarily.
1. Clean Your Camera Lens Before Taking Photos
This might sound obvious, but a dirty camera lens is one of the easiest reasons for blurry or hazy pictures.
Fingerprints, dust and smudges can reduce clarity, make lights appear hazy and affect the overall quality of your photos.
What to do:
- Wipe your camera lens gently with a clean, soft microfiber cloth.
- Check the lens for fingerprints before important shots.
- Avoid using rough materials that could scratch the lens.
- Keep your phone's camera area free from dust and dirt.
A quick lens cleaning can sometimes improve your photos more than changing multiple camera settings.
2. Use the Right Camera Settings for Better Photos
You don't need to switch to Pro Mode for every picture. Start with your phone's default camera mode and adjust settings according to the scene.
Enable Gridlines
Gridlines divide the camera view into sections, helping you position your subject and keep horizons straight.
You can use the rule of thirds by placing your subject along one of the gridlines or at an intersection rather than always keeping it in the centre.
This works particularly well for:
- Travel photography
- Landscapes
- Street photography
- Portraits
- Food photography
Tip: Look for the Grid or Gridlines option in your camera settings.
Tap to Focus
Before taking a photo, tap the person or object you want to keep sharp.
Your smartphone will usually adjust focus and exposure around that point.
For portraits, tap the subject's face. For food photography, tap the dish. For close-up shots, focus on the most important detail.
Some phones also allow you to lock focus and exposure by pressing and holding the screen.
Adjust Exposure
Exposure controls how bright or dark your image appears.
If your photo looks too bright, reduce the exposure slightly. If the subject appears too dark, increase it carefully.
This is especially useful when photographing:
- Bright skies
- People near windows
- Sunset scenes
- Subjects against strong backlighting
Avoid making the entire image unnecessarily bright, as this can cause highlights to lose detail.
Use HDR When Needed
High Dynamic Range (HDR) helps balance scenes containing both bright and dark areas.
For example, when photographing someone standing in front of a bright window, HDR may help retain more detail in the background while keeping the subject visible.
Many smartphones automatically apply HDR. Keep it enabled or on Auto if you regularly photograph scenes with contrasting light, unless it produces unwanted results.
Choose the Correct Resolution
Most smartphones offer a standard Photo mode and, on some models, a high-resolution mode.
Use the standard mode for everyday photography. High-resolution capture can be useful when you want additional detail or expect to crop the image later.
However, high-resolution photos may occupy more storage and do not automatically guarantee better image quality in every lighting condition.
3. Understand ISO, Shutter Speed and White Balance
If your smartphone has a Pro or Manual mode, learning a few basic settings can give you more control over your photos.
ISO: Control Light Sensitivity
ISO determines how sensitive the camera sensor is to light.
- Low ISO: Usually produces cleaner images in bright conditions.
- High ISO: Helps in darker environments but can introduce visible noise or grain.
For outdoor photography in daylight, a low ISO is generally a good starting point. In low light, a higher ISO may be necessary.
There is no single ISO setting that works for every situation.
Shutter Speed: Control Motion
Shutter speed determines how long the camera captures light.
- A faster shutter speed helps freeze movement.
- A slower shutter speed captures more light but increases the risk of blur if the phone or subject moves.
Use faster shutter speeds for moving children, pets or sports. For night photography, stabilise your phone and let Night Mode handle longer exposures when appropriate.
White Balance: Keep Colours Natural
White balance affects how warm or cool your photos appear.
If an indoor photo looks too yellow or an outdoor image appears too blue, adjusting white balance can help correct the colour.
Auto White Balance works well for most everyday shots. Manual adjustment is useful when you want consistent colours across a series of photos.
4. Use Natural Light for Better Results
Lighting often makes a bigger difference than the number of megapixels your camera has.
Whenever possible, use soft natural light instead of relying on your phone's built-in flash.
For portraits: Stand near a window or photograph outdoors in soft light.
For food: Place the dish near a window to bring out its texture and colour.
For travel: Try photographing landscapes during early morning or late afternoon, when the light is often softer.
For indoor photos: Avoid placing a bright light source directly behind your subject unless you want a silhouette.
If natural light is insufficient, a small LED light can help illuminate your subject more evenly.
5. Avoid Excessive Digital Zoom
Zooming in can help you frame distant subjects, but digital zoom often reduces detail by cropping and enlarging the image.
For better results:
- Use the phone's dedicated optical telephoto camera if available.
- Move closer to the subject when it is safe and practical.
- Use the standard 1× camera for everyday photography.
- Avoid extreme digital zoom when image quality matters.
If you need to photograph distant objects regularly, check whether your smartphone has a dedicated telephoto lens.
6. Choose the Right Camera Mode
Different scenes require different approaches. Selecting the appropriate camera mode can make the process easier.
Portrait Mode
Portrait Mode creates a shallow-depth-of-field effect, keeping the subject sharp while blurring the background.
It works well for people and some close-up subjects. However, it can sometimes blur hair, glasses or other edges incorrectly.
For a natural result, leave some distance between the subject and the background.
Night Mode
Night Mode combines multiple exposures to brighten dark scenes and reduce noise.
For sharper night photos:
- Hold your phone steadily.
- Keep moving subjects as still as possible.
- Avoid moving the phone while the camera captures the image.
- Use a tripod for longer exposures when needed.
Macro Mode
Macro Mode helps capture close-up details such as flowers, textures and small objects.
Move the phone slowly until the subject is in focus. If the image looks soft, try moving slightly farther away or using the main camera instead.
Pro Mode
Pro Mode gives you manual control over settings such as ISO, shutter speed, focus and white balance, depending on the device.
It's useful when you want consistent results, photograph challenging lighting or experiment creatively. For everyday pictures, the standard Photo mode is often the simplest starting point.
7. Composition: Make Your Photos More Interesting
Good composition helps guide the viewer's attention towards the subject.
Follow the Rule of Thirds
Use the gridlines to place your subject off-centre when it suits the scene.
For landscape photography, try placing the horizon along the upper or lower gridline rather than directly in the middle.
Keep the Background Simple
A cluttered background can distract from the subject.
Before taking the shot, check for objects, bright signs or other visual distractions behind the person or object you're photographing.
Sometimes, moving a few steps to one side can dramatically improve the composition.
Experiment with Different Angles
Don't take every photo from eye level.
Try:
- A slightly lower angle for buildings or products.
- A top-down view for food.
- Eye level for portraits.
- Wider framing to show the environment around your subject.
Changing your viewpoint can make familiar subjects look more interesting.
8. Best Gear for Better Smartphone Photography
You don't need to purchase every accessory available. Choose equipment that solves a specific photography problem.
Smartphone Tripod
A tripod keeps your phone steady and is useful for:
- Group photos
- Self-portraits
- Night photography
- Time-lapse videos
- Product photography
Look for a stable tripod with a secure phone holder.
Mini LED Light or Ring Light
Additional lighting can help when taking indoor portraits, product shots or videos.
A small LED light is often more versatile, while a ring light can provide even illumination for talking-head videos and close-up content.
Smartphone Gimbal
A gimbal uses motorised stabilisation to reduce unwanted movement during video recording.
It is useful for walking shots, travel videos, reels and moving camera shots. A tripod may be enough if you mostly record stationary videos.
Clip-On Microphone
If you create reels, interviews or vlogs, clear audio matters just as much as good visuals.
A compatible external microphone can reduce the impact of background noise and improve voice clarity.
Check the phone's connector and microphone compatibility before buying.
Power Bank
Photography and video recording can consume a lot of battery, especially when using mobile data, high screen brightness or high-resolution video.
A compatible power bank is useful for travel, outdoor shoots and long content-creation sessions.
Microfiber Cleaning Cloth
This is one of the simplest and most affordable accessories you can carry. It helps keep the camera lens clean and ready for use.
9. Edit Your Photos Without Overdoing It
Editing can improve an already good photograph, but excessive adjustments may make it look unnatural.
Start with small changes to:
- Brightness and exposure
- Highlights and shadows
- Contrast
- White balance
- Cropping and straightening
- Colour intensity
Apps such as Google Photos, Snapseed and Adobe Lightroom Mobile offer tools for basic and advanced photo editing.
If you want to retain more editing flexibility, check whether your smartphone supports RAW capture. RAW files retain more image information than standard JPEG images but require more storage and often need additional editing.
10. Common Photography Mistakes to Avoid
Even a capable smartphone camera can produce disappointing results when basic photography habits are overlooked.
Avoid these common mistakes:
- Taking photos with a dirty lens.
- Using excessive digital zoom.
- Photographing people against harsh, direct light without adjusting the composition.
- Moving the phone while taking low-light pictures.
- Using Portrait Mode when the subject's edges are difficult to separate from the background.
- Increasing brightness so much that highlights lose detail.
- Applying too many filters or excessive skin smoothing.
- Buying accessories before learning how to use the camera you already have.
The most effective improvement is often to adjust your lighting, focus and framing before changing any other setting.
Frequently Asked Questions
How can I improve my phone camera quality?
Clean the lens, use good lighting, tap to focus, adjust exposure and keep the phone steady. These simple habits can improve results without requiring a new smartphone.
Which camera settings are best for everyday photos?
Start with standard Photo mode, enable gridlines, use Auto HDR where appropriate and tap your subject to focus. Adjust exposure if the image appears too bright or dark.
Is Pro Mode better than normal camera mode?
Not always. Pro Mode gives you greater control, but automatic modes can produce excellent results for everyday photography. Use Pro Mode when you need more control over exposure, focus or colour.
Which gear should beginners buy first?
Start with a microfiber cloth and, if you need steadier shots, a basic smartphone tripod. Add lighting, a gimbal or an external microphone only when your photography needs justify the purchase.
Does a higher megapixel count guarantee better photos?
No. Image quality also depends on sensor size, lens quality, lighting, focus, image processing and how the photo is captured.
Take Better Photos with the Smartphone You Already Own
Great photography is not only about expensive equipment. It comes from understanding light, choosing the right settings, composing the frame carefully and knowing when an accessory will actually help.
Start with the basics: clean your lens, enable gridlines, tap to focus, use natural light and avoid excessive digital zoom. Once these habits become natural, experiment with Pro Mode, Night Mode, editing tools and accessories to develop your own photography style.
With practice, you can capture sharper portraits, better travel pictures and more engaging social media content using the smartphone already in your pocket.